Building a React app with the Spotify Web Playback API
In this guide, I'll be demonstrating how to use the Spotify Web Playback API and how to connect it up with a React app.

The Spotify for Developers team recently released a beta version of their new web playback API, and I've been having a play around with it over the Christmas week. It's been a lot of fun, and small bugs aside, surprisingly straightforward to work with.
This project will be focusing purely on getting the API working, so we won't be focusing on styling or anything beyond a basic player with controls and a "now playing" display. I've hosted the finished code on Glitch - you can find the link below-where you're free to edit remix your own copy to your heart's content.
Prerequisites
This guide assumes that you have some knowledge of Javacript, the browser development console, React and how APIs work. If you want to learn about these topics, there's a few resources online I really recommend:
Javascript
- Codecademy's Introduction to Javascript course is fantastic for first-time Javascript users, or if you need a refresh of the fundamentals.
- JavaScript — Just another introduction to ES6 is a fantastic introduction to more modern "ES6" features of Javsacript.
- You Don't Know JS covers the above in a lot more detail, it's very good as a reference to come back to.
- Javascript Promises For Dummies is my favourite article for explaining how to use Promises,
async, andawaitin Javascript and why you might want to. - How to Use the JavaScript Fetch API to Get Data is a great introduction to using the
fetchAPI instead of other methods you may have seen.
React
- Codecademy: Learn ReactJS is an interactive tutorial for getting to grips with React.
- The official React tutorial is also not a bad option.
- Thinking In React is another React-made resource, which helps to explain how to tackle your problem, React style.
Setting Up
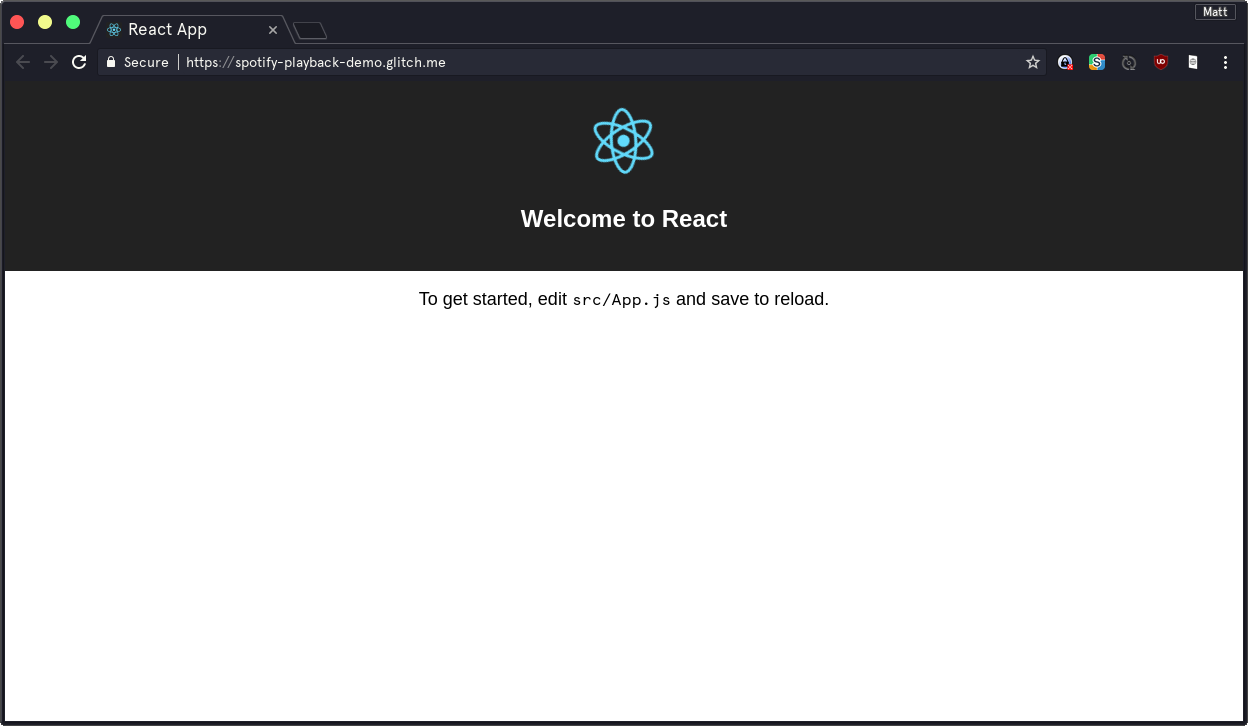
The first step is to create your project. If you're doing this locally, I recommend using the create-react-app to get started (learn more here). Otherwise, if you're following along using Glitch, you can simply remix this example React app and you're good to go (follow the instructions in the README file though!)
We'll then start editing the app so that we can store all the information that we need:
- An API token that we'll provide to the Spotify API so that we can log in with a Spotify account,
- a device ID that represents this web browser as a "Spotify player",
- a boolean value showing whether we're trying to logged in or not (along with an error message if something goes wrong).
- the track name, artists' names, and album name,
- whether the player is currently paused or playing a track (we'll use this to change the play/pause button),
- the current progress of the track.
So, let's open src/App.js, and set the state of the App component, setting
these default values:
class App extends Component {
  constructor(props) {
    super(props);
    this.state = {
      token: "",
      deviceId: "",
      loggedIn: false,
      error: "",
      trackName: "Track Name",
      artistName: "Artist Name",
      albumName: "Album Name",
      playing: false,
      position: 0,
      duration: 0,
    };
  }
  render() {
    /* ... */
  }
}
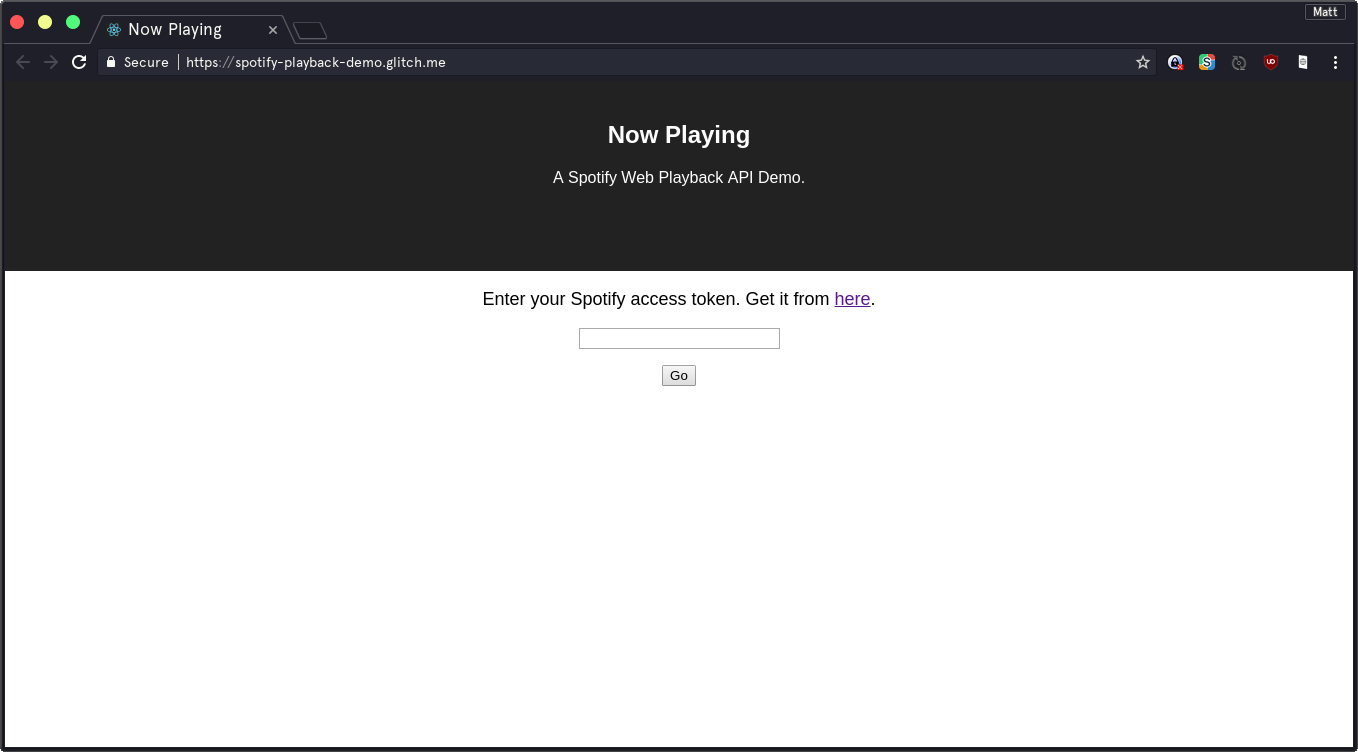
We'll also edit the render() method so that we can display a text box and a button for the user to enter their Spotify access token.
render() {
  const { token } = this.state;

  return (
    <div className="App">
      <div className="App-header">
        <h2>Now Playing</h2>
      </div>
      <p className="App-intro">
        Enter your Spotify access token. Get it from{" "}
        <a href="https://beta.developer.spotify.com/documentation/web-playback-sdk/quick-start/#authenticating-with-spotify">
          here
        </a>.
      </p>
      <p>
        <input type="text" value={token} onChange={e => this.setState({ token: e.target.value })} />
      </p>
      <p>
        <button>Go</button>
      </p>
    </div>
  );
}
We then need to update the page to show the form only if the user isn't logged into Spotify. We can do this by checking for the loggedIn state variable.
On the "logged in" screen, we'll also display the currently playing track.
I also went to the courtesy of printing out the error value if it gets set, which should hopefully make fixing problems a lot easier further down the line.
render() {
  const {
    token,
    loggedIn,
    artistName,
    trackName,
    albumName,
    error,
    position,
    duration,
    playing,
  } = this.state;

  return (
    <div className="App">
      <div className="App-header">
        <h2>Now Playing</h2>
        <p>A Spotify Web Playback API Demo.</p>
      </div>

      {error && <p>Error: {error}</p>}

      {loggedIn ?
      (<div>
        <p>Artist: {artistName}</p>
        <p>Track: {trackName}</p>
        <p>Album: {albumName}</p>
      </div>)
      :
      (<div>
        <p className="App-intro">
          Enter your Spotify access token. Get it from{" "}
          <a href="https://beta.developer.spotify.com/documentation/web-playback-sdk/quick-start/#authenticating-with-spotify">
            here
          </a>.
        </p>
        <p>
          <input type="text" value={token} onChange={e => this.setState({ token: e.target.value })} />
        </p>
        <p>
          <button onClick={() => this.handleLogin()}>Go</button>
        </p>
      </div>)
      }
    </div>
  );
}
You may have noticed that we referenced a new method for the App component, handleLogin(), which is called when the user clicks on the "Go" button. For now, this just updates the state to set loggedIn to true.
handleLogin() {
  if (this.state.token !== "") {
    this.setState({ loggedIn: true });
  }
}
Connecting the Spotify API
The next step is to connect this up to the Spotify API. If you visit the API's quick start page, under the "Installing the SDK" section, there's a <script> tag in the code which we'll use. Paste this into the public/index.html file, and add this little script tag too:
<body>
  <div id="root"></div>
  <!-- ... -->
  <script src="https://sdk.scdn.co/spotify-player.js"></script>
  <script>
    window.onSpotifyWebPlaybackSDKReady = () => {
      window.Spotify = Spotify;
    }
  </script>
</body>
The first script tag loads the playback SDK into the browser window. The second one assigns a window variable, called Spotify, to the global Spotify variable, inside the window.onSpotifyWebPlaybackSDKReady method. This method is called by the javascript file we just linked when it has finished loading, so we know by this point, we can happily use the Spotify variable without any trouble.
Setting window.Spotify may seem a little odd. The reason we do this is because React runs on its own copy of the web page's HTML (for performance reasons, mostly). So it isn't actually able to see the global Spotify variable! Therefore, we add it to the window object as this can be accesed by React.
Now, if we go back to src/App.js, we can now create a method to check for this variable, and if it exists, to create the Player object---this is what we'll use to send/receive most data to and from Spotify.
checkForPlayer() {
  const { token } = this.state;

  if (window.Spotify !== null) {
    this.player = new window.Spotify.Player({
      name: "Matt's Spotify Player",
      getOAuthToken: cb => { cb(token); },
    });
    // this.createEventHandlers();

    // finally, connect!
    this.player.connect();
  }
}
This example works pretty much identically to how the documentation recommends setting things up, but instead of using a constant OAuth token, we're taking it from our app component's state, and instead of creating a global variable called player, we just add player as one of the app's class variables. This means that we can access it from any of the other class methods.
Finally, after adding our event handlers (we'll come onto that shortly) we can then connect to the player!
One more thing we need to do is to run the checkForPlayer() method repeatedly until the SDK is ready. For this, we'll use setInterval to run the method repeatedly. Add a new variable for this interval in the constructor, so that we can cancel the interval later on:
constructor(props) {
  super(props);
  this.state = {
    /* ... etc ... */
  };
  /* create the variable */
  this.playerCheckInterval = null;
}
And then we'll create the interval inside our button click handler.
handleLogin() {
  if (this.state.token !== "") {
    this.setState({ loggedIn: true });
    // check every second for the player.
    this.playerCheckInterval = setInterval(() => this.checkForPlayer(), 1000);
  }
}
This will now run the player checking method every second (1000 ms). Of course, once it is created, we need to destroy the interval. So in the checkForPlayer(), we need to add this:
checkForPlayer() {
  const { token } = this.state;

  if (window.Spotify !== null) {
    // cancel the interval
    clearInterval(this.playerCheckInterval);
    /* etc... */
  }
}
Handling Events
Now is a good time to set up our event handlers, so we can update our app whenever something is received from the API. Let's create another class method, call createEventHandlers():
createEventHandlers() {
this.player.on('initialization_error', e => { console.error(e); });
this.player.on('authentication_error', e => {
console.error(e);
this.setState({ loggedIn: false });
});
this.player.on('account_error', e => { console.error(e); });
this.player.on('playback_error', e => { console.error(e); });
// Playback status updates
this.player.on('player_state_changed', state => { console.log(state); });
// Ready
this.player.on('ready', data => {
let { device_id } = data;
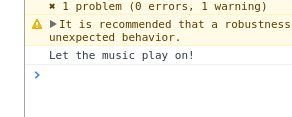
console.log("Let the music play on!");
this.setState({ deviceId: device_id });
});
}
For now, we'll just print out all information to the developer console. Notice also, that if there's an authentication error, we set the loggedIn state variable to false. This will take us back to the login page so that we can log in again with a new token. This is because we'll most likely get this error if the token is incorrect, or if it has expired (these tokens will only last an hour).
Oh, and remember to uncomment the call to createEventHandlers() in the checkForPlayer() method!
clearInterval(this.playerCheckInterval);
this.player = new window.Spotify.Player({
  name: "Matt's Spotify Player",
  getOAuthToken: cb => {
    cb(token);
  },
});
this.createEventHandlers();
Now, let's give this a try. Go to the Spotify documentation page, and click the button to "get your web playback SDK access token". Sign in with your Spotify account and you'll get your access token:
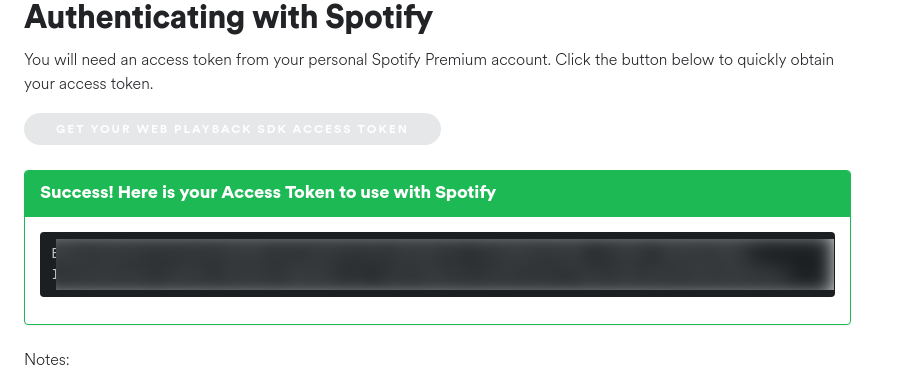
Now go to your app, and press F12 (or equivalent) to show the developer console. Pop the token you just received into the text box and press go. Hopefully you will then see your success message appear!
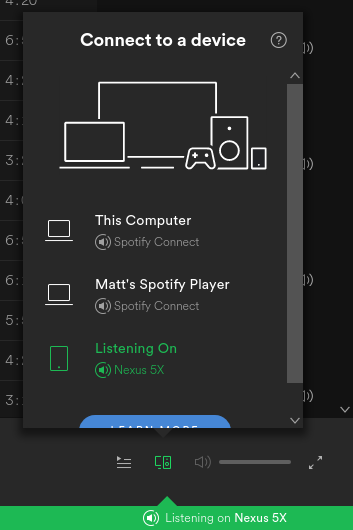
Now, if you open a Spotify app on any of your devices and start playing some music, you should be able to click on the "devices" menu, and see your app there. Give it a click and you should then be hearing the music come from your browser!
You'll also get some interesting information in the console.

This is the Spotify player's "state", which shows information like the current track, tracks coming up, current volume, whether shuffle and repeat modes are on, and more. We'll now use this to set our app component's state variables.
You can find out more about the player state object and the information you can get out of it here.
Showing Now Playing Information
We need to handle this player state object to update our app's own state. To do this, we'll create a new method called onStateChanged():
onStateChanged(state) {
  // if we're no longer listening to music, we'll get a null state.
  if (state !== null) {
    const {
      current_track: currentTrack,
      position,
      duration,
    } = state.track_window;
    const trackName = currentTrack.name;
    const albumName = currentTrack.album.name;
    const artistName = currentTrack.artists
      .map(artist => artist.name)
      .join(", ");
    const playing = !state.paused;
    this.setState({
      position,
      duration,
      trackName,
      albumName,
      artistName,
      playing
    });
  }
}
This is quite self-explanatory in that it takes the player state object we just received, and picks out the bits of information we're interested in, before calling setState() to update the app component's state. One thing to note is that, rather than providing the track artists' names as a string, we receive a list of "artist objects". So a little bit of functional javascript formats this into a string for us to print out.
Then, we'll need to update the player_state_changed event handler so that we call our new method:
createEventHandlers() {
  /* ... */
  this.player.on('player_state_changed', state => this.onStateChanged(state));
  /* ... */
}
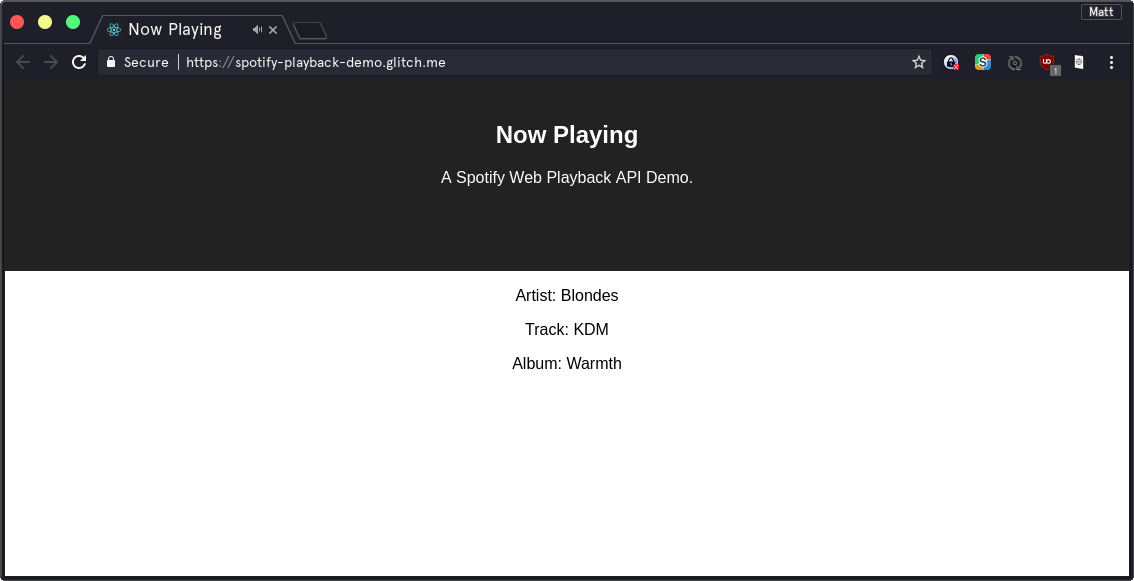
Now, if you log in again with your token, and switch your player to your app using another Spotify app, you should now be able to see information about the currently playing song!

Adding Player Controls
What's the use of a music player if we can't control the music? The next step for us to is to create play, previous and next buttons. Let's update the now playing section, inside the render method:
<p>Artist: {artistName}</p>
<p>Track: {trackName}</p>
<p>Album: {albumName}</p>
<p>
  <button>Previous</button>
  <button>{playing ? "Pause" : "Play"}</button>
  <button>Next</button>
</p>
We've added three new buttons to control the player, with the label of the play/pause button changing depending on if the music is playing or not.
Let's now wire these buttons up to methods so that they actually do something! We'll create a new method for each button:
onPrevClick() {
  this.player.previousTrack();
}

onPlayClick() {
  this.player.togglePlay();
}

onNextClick() {
  this.player.nextTrack();
}
And we also need to update our actual buttons to use these new methods:
<button onClick={() => this.onPrevClick()}>Previous</button>
<button onClick={() => this.onPlayClick()}>{playing ? "Pause" : "Play"}</button>
<button onClick={() => this.onNextClick()}>Next</button>
Now if you log in and get some music going, these buttons should now all work! There's a lot more to the Spotify Web Playback API than just this, so I definitely recommend that you check out the documentation to find out about all the information you can get about the player's state, as well as the commands you can send to it. As well as this, there is also the existing (and also very good) Web API that allows you to get and set more player settings than you're able to with the playback API. The best bit is that the access token you use for the Playback API will work with the Web API too, so you'll only need to get the token once. Spotify also provides a full OAuth flow, so if you connect your app with a server, you can let users log in straight to Spotify and not have to worry about copying tokens around!
Extension: Automatically Playing Music From The App
So one thing that you may have found annoying was having to go into one of your Spotify apps to select the web player to hear music. The good news is that you can do this through the Spotify Web API! Since it's still in beta, it sometimes doesn't work because of a known bug (it's being worked on), but for the most part works well. The API endpoint we'll be using is the /v1/me/player endpoint.
Let's make a new method in our app to handle this. We're using the device ID we received when we first connected the player, which is a unique identifier for the web app:
transferPlaybackHere() {
  const { deviceId, token } = this.state;
  fetch("https://api.spotify.com/v1/me/player", {
    method: "PUT",
    headers: {
      authorization: `Bearer ${token}`,
      "Content-Type": "application/json",
    },
    body: JSON.stringify({
      "device_ids": [ deviceId ],
      "play": true,
    }),
  });
}
The play variable we sent to the API endpoint is set to true here so that, as documented on Spotify's website, the music will start playing regardless of whether it was paused by the user on another device beforehand. The final step is to call this new method when our player connects:
createEventHandlers() {
  /* ... */
  // Ready
  this.player.on('ready', async data => {
    let { device_id } = data;
    console.log("Let the music play on!");
    await this.setState({ deviceId: device_id });
    this.transferPlaybackHere();
  });
}
There's a small issue here - the transferPlayBackHere() method grabs the device ID from the app component's state. However, the setState method does not instantly update the app's state. However, since it returns a Promise, we can just make the function asynchronous by adding the async keyword before the function declaration (async data => {}), and then adding the await keyword before the setState() call. We can then add the transferPlaybackHere() call, safe in the knowledge that the device ID variable will be set!
And now, if you're listening to Spotify on any device and log into the web app, the music should automatically switch over to the web app! The main caveat here is that Spotify will only let you listen on one device per account at a time. The advantage of this though is that you can control any device's playback from the other devices. So essentially, you could use the Web API to build a remote controller for your media center if you wanted. I'm currently working on building a website where you can join rooms with other people and listen to a collaborative playlist at the same time, for example. I'll release the code and a demo as soon as I have a working version available :smile:
Extending The App
There's a lot of possible things you could do to take your new app further. Here's some ideas:
- Improve the style and layout of the app to look nicer, perhaps grabbing the album art from the player's state
- We currently only get player state updates when the track is paused or changed, or the volume adjusted. Perhaps add a
setTimeout()method that calls the player's getCurrentState method to get more frequent updates? - Creating a progress bar using the provided
positionanddurationvariables - Splitting up the code into components and containers so that it's easier to manage
- Writing a small server to deal with user sign-ins---using Spotify's authorization system
- Better error handling, including showing an error to the user if they get signed out.
- Adding components that let the user search for songs and add them to the play queue.
- Do something interesting with the Audio Features API...?
- Remake this app using the Spotify API
Thanks!
Hopefully this guide helped you to get started building awesome apps with React and the Spotify Web Playback API. If you have any problems, feedback, praise or criticism, please do contact me in one of a few ways:
- One of my many social media links on my contact page
- Opening a new issue on my website's GitHub repository
Also, a massive thank you to the Spotify for Developers team. I haven't been this excited about an API in quite a long time, and as a big music fan, I can't wait to see what kinds of things I end up building on this platform!